Thursday, September 10, 2015

Silver Coaster Christmas Ornament Class

 Here is the next class coming up at Vintage Bloom, the Silver Coaster Christmas Ornament.  We will be taking an old silver plated coaster and adding vintage sheet music, lace, metal thread trim with a paper flower made from old ledger paper and a vintage button.  It will then be incased under an old domed clock glass and finish off with rhinestone chain.  Then because more is more it will be topped off with a cluster of vintage brass stampings and a beaded chain. 
The class is Saturday, October 17th from 10-5 at Vintage Bloom art studio.
2640 Walnut Ave. Suite K, Tustin, Ca. 92780 
The cost is $150 and that includes all materials and lunch. 
Space is limited so if your interested please email me at mchurtt@aol.com 

Monday, January 26, 2015

LOVE banner class rescheduled


The LOVE banner class is being rescheduled.  I needed to change the date due to my beloved dog Dozer needs surgery this week.  The new date is February 14th from 10-4.  I know that is Valentines day but what better way to celebrate then doing something for yourself that you will LOVE!  Please email me if your interested, there are still spaces available at mchurtt@aol.com
This is an older picture of my boy.  He will be 9 in March and he means the world to me. 
Thanks for understanding.

Monday, January 19, 2015

Soldered LOVE Banner

 This is a great project, I just love it! 
The banner is made by layering pink paper, red ribbon and vintage lace with some rhinestones and silver hearts.  Each letter is then sandwiched between glass and soldered. 
We will connect all the pieces with some wire wrapped beads and add vintage Mother of Pearl buttons under beveled glass for the ends.  Then embellish with some pink seam binding ribbon to finish it all off. 
 The class will be held on Saturday February 14th from 10-4.  The cost is $95, that includes your kit to make the banner and lunch.  Please email me at mchurtt@aol.com if your interested in attending. Once your signed up I will send you a supply list.    
Happy Valentines Day


Valentine Chocolate Box Project

Here is one of the two projects I have come up with for Valentines Day.     
 The box is about 4 inches in diameter and we will be embellishing them with vintage flowers, sheet music, lace and a heart hanging in the center cut from a silver tray.
 The box is fun and easy to make.  All the supplies will be included for this project and I will have extra kits available for purchase.
The class will be Saturday January 24th from 1-4 at Vintage Bloom Art Studio in Tustin.  The cost is $65.00 and all materials are included.  It your interested in attending please email me at mchurtt@aol.com and I will send you a Paypal invoice. 


Thursday, September 11, 2014

Grand Opening of Vintage Bloom

This last Saturday September 6th was the grand opening of Vintage Bloom Art Studio.  It took me a little longer then I expected to get everything moved in, organized and looking just the way I wanted it to but I couldn't be happier with how everything turned out.


 Two of my good friends from Seattle made it to the party
 
My sister in law, Molly Hurtt of "Sugar Pop Parties" did all the food.

 Everything looked and tasted so great.
 

Macaroons

I have the front of the space set up to sell all my lovely vintage flowers
and a few other things.

A friend made these aprons for the studio.

Some of my hand made jewelry was for sale too.

I wish I had more pictures to post but it was a busy day and I was lucky to get these. 
Thanks to everyone who made it and for supporting me in this new adventure!
 

Thursday, August 21, 2014

MM Soldered and Embellished Crown


I made this crown for the Spellbinders Creating A Gilded Life Contest.  The crown is made from thin copper that I cut out using the petite monarch die cut from A Gilded Life collection.  I soldered all the parts together, added patina then embellished the crown with mother of pearl beads and vintage rhinestones. 

Friday, February 15, 2013

Getting ready for the Spring Glitterfest

 Twice a year there is a show called "Glitterfest. 
I have been selling my books and jewelry there for the last two years.
 
 This year they moved the show to Anaheim. 
It will be on March 9th from 10-4
 
 Here are a few of the books I will have at the show.
 
 They are all made from Silver plated serving trays and vintage findings.
 
For more information and directions to the new location
check out their web sight at www.glitterfest.com

Silver Tray Book Class

 Here are the pictures from the class I taught in December
and the wonderful Ladies who came.
 
 Sorry I am so behind on getting this posted but better late then never.
 
 Everyone made a book from a silver plated serving tray.
 
They all turned out great!


Thursday, November 29, 2012

Getting ready for a "Silver Tray Book" class


I went to an art retreat a few weeks ago called Spellbound.  It was so inspiring how everything was put together from the name tags to the class kits.  I thought I would borrow some of their amazing ideas for my own class I am teaching that's coming up.
 
 
This class is for my "Silver Tray Books".  Each kit comes with a pre cut tray for the front of the book and sheet metal for the back.  Two brass hinges, all the hardware and watercolor paper for the inside.  I made these bags to put everything in.  Most of the time I think I do this stuff to amuse myself but I know the ladies will appreciate it like I do.
 
 
Then I made these name tags for each of the ladies.  They look like I soldered them but I saved time by just using silver tape instead of the copper and didn't even need to add solder.  Everything is glued together and a pin was added to the back to wear the day of class so I can remember everyone's names.
 
 
One of the ladies at Spellbound used these trays in her class.  She got them at the .99 cent store.  I hunted them down and had to have them.  They work perfectly with the class theme don't you think.  After I put everything together on the trays I tied it with old seam binding ribbon and added the name tags.  I love how they turned out.
 
 
By the end of Saturday everyone should have a finished book that looks something like this one. 


Friday, July 20, 2012

Lanie's 1st Birthday Carnival Invitations

You know it's been a while since your last blog when you can't figure out how to start a new page.  A few tries later and I think I got it.

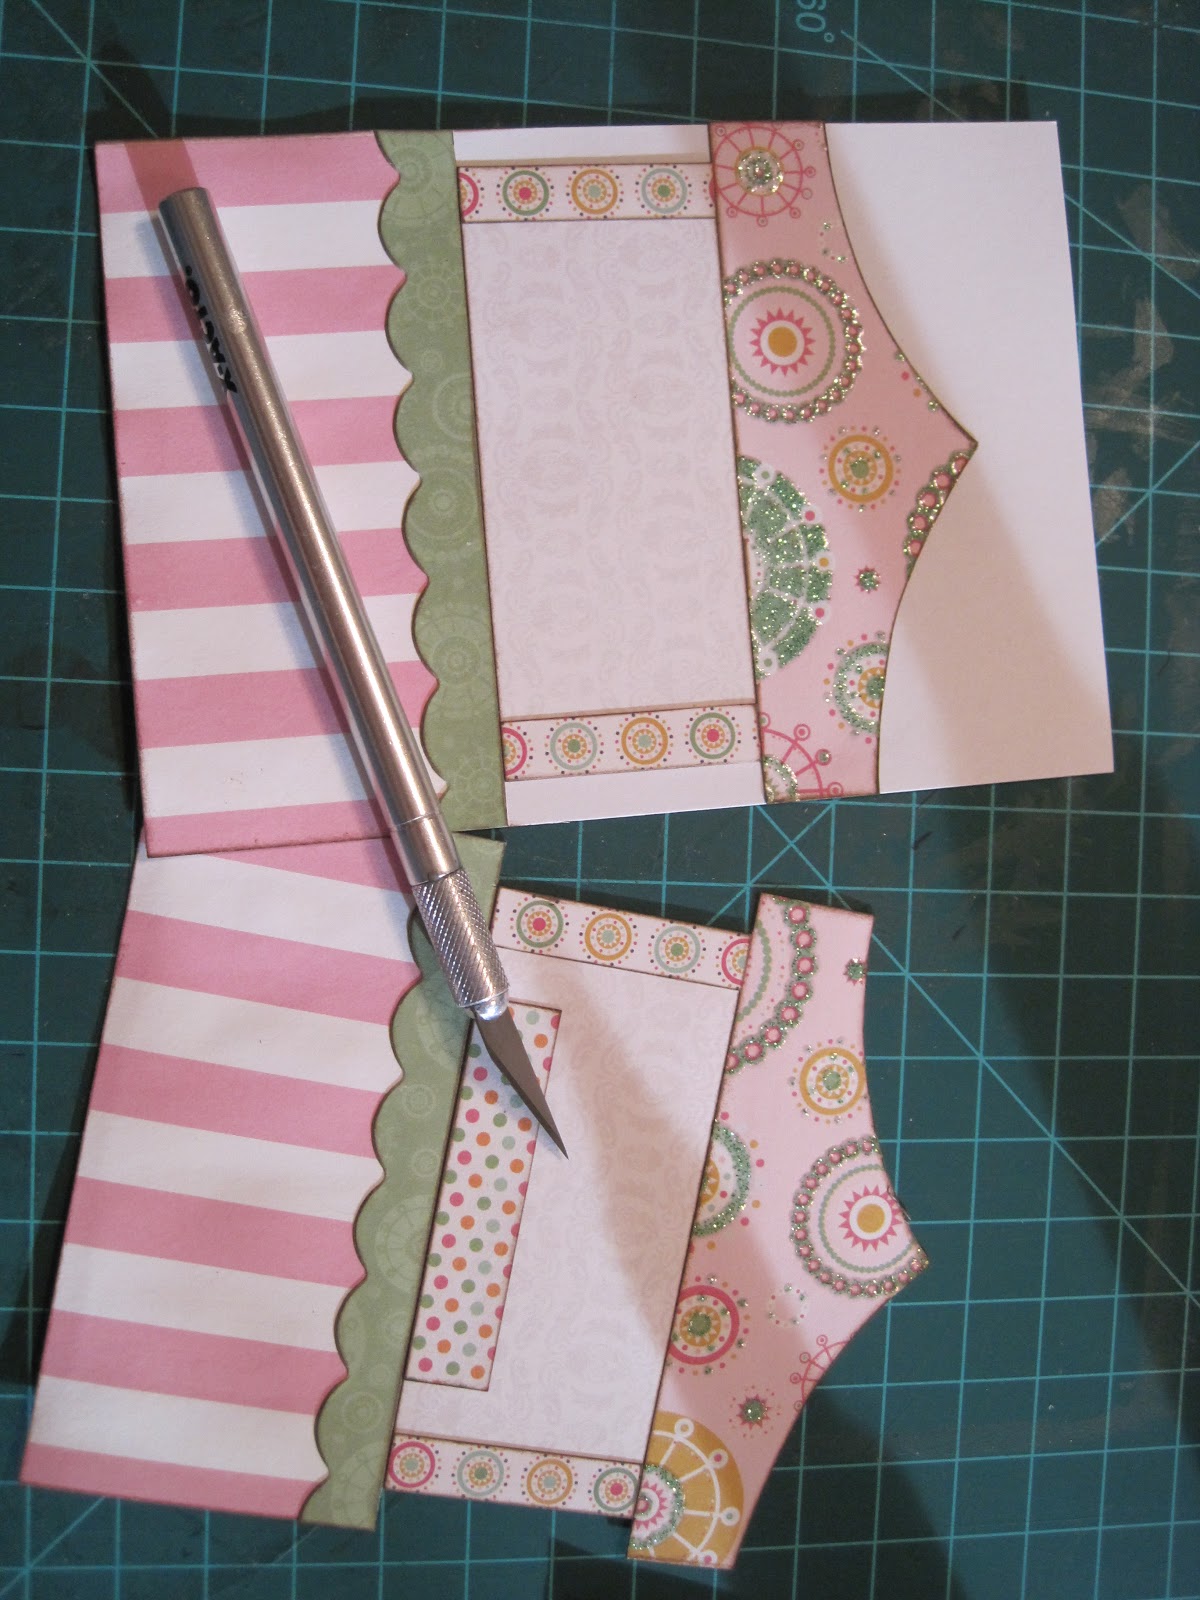
My sister-in-law it having a Birthday part for her daughter who is turning 1 and asked me to make the invitations.  I had seen this vintage carnival paper in pinks, yellow and greens and loved it so we decided to go with that as our theme.

 
I wanted the front to be a carnival booth that would open up in the middle.  I started by cutting out all the shapes for the booth.

 
Then I added brown around all the edges to add some depth otherwise it was just to flat.

Glue all the pieces to a sheet of paper then cut away the extra so when you cut it down the middle it will all stay together.

Cut out all the cotton candy, three per card and add glitter to them.


I tried the booth on different shades of pink card stock to see what I liked best.  In the end I went with white and a hot pink envelope.

For the inside my sister-in-law Molly came up with the wording and found these great fonts on line to download for free.  I printed it on velum then added the pink cardstock behind it.


So fun.  They took a little longer then I would have liked but I enjoyed making them.  Now I want to make a life size carnival booth out of wood and paint it to match the invitations.  Thought it would be fun as the entrance to the party and to use as a photo booth.

Have to add a picture of Dozer sleeping. 
You got to love that face.


Sunday, March 18, 2012

Over the top "Alice in Wonderland" Birthday Party


 I just got back from Sacramento where my sister in law Molly and I threw a Birthday party for her 10 year old niece. The theme was "Alice in Wonderland" and we had so much fun.


It had rained in Sacramento all week so we ended up having to rent a tent but it worked out great.

Molly loves to do Candy Bars for her parties and all the colors in the glass jars are so much fun!

Each girl had her own place setting with fancy china, party hat, Drink Me bottles, candy and the list goes on.  We have a hard time editing because everything is so cute.


Molly found old tea cups and glued then together all topsy tervy.  Loved it.

I decorated Mad Hatter cookies and put the Birthday Girl's birth date on them.


The Birthday Girl with her cousin Lilly.  We had such a great time I can't wait to do it again.